Imagine you’re handed a flat pattern of six colored squares, three labeled A, B, and C—then asked to fold it into a cube. Which panel never ends up on the finished box? That’s the brain‑teaser we’re tackling today. Many solvers assume every face appears or fold in the wrong order, overlooking key edge‑to‑edge connections. In our step‑by‑step guide, we’ll map each square’s neighbors, simulate the folds, and reveal why one panel is left dangling. Ready to see which detail isn’t necessary? Dive in, follow the logic, and share your answer in the comments!
What Do You Think?
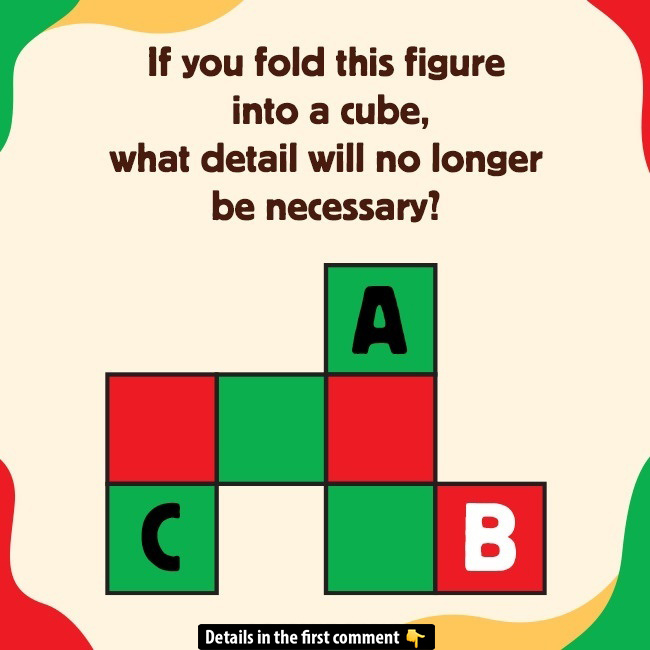
At first glance, it’s just a colorful pattern of six squares—three red, three green—labeled A, B, and C on three of them. But when you fold the flat net up, one of these faces never actually appears on the completed cube. Can you tell which one? Sharpen your focus, picturing how each panel bends and meets its neighbors, then lock in your guess.
Video
Want to shake off stress? Give these cheerful puzzles a go!
Common Pitfalls: Why Many Get Tripped Up
- Assuming All Labels Must Appear: It’s tempting to think each marked face ends up visible—but cube nets often have “hidden” panels.
- Overlooking Adjacencies: Ignoring which squares share an edge can lead to impossible pairings when folded.
- Folding in the Wrong Order: Mentally folding square A first might obscure how B and C align, causing confusion.
To avoid these mistakes, take it slowly: identify each square’s neighbors, then imagine the net folding up step by step.

Step‑by‑Step Solution: Why C Disappears
Map the Neighbors:
- Square A sits above a red panel flanked by two greens.
- B lies at one end of the row, adjacent to a green.
- C is off to the side, attached only by one edge.
Visualize Folding:
- Fold the central strip of three (red–green–red) into a vertical column.
- A folds down to form the top face.
- B closes up on the opposite side to form a side face.
- The remaining green panels wrap to form the other four faces.
Spot the Orphan Panel:
- When you try to fold C into place, you’ll find it collides with already‑folded faces or floats in mid‑air—it never becomes part of the cube’s surface.
Conclusion:
- C is the panel you don’t need—the cube forms perfectly using A and B, but the square marked C is left hanging.

Join the Conversation: Share Your Take!
Did you see right away that C drops out, or did you need to trace each fold carefully? Tell us your approach in the comments below—and feel free to sketch out your folding order! If you enjoyed this spatial riddle, explore more of our puzzles to keep honing your logical and visualization skills. Happy folding!